My husband went out of town to work on his masters degree for a couple days. So, I figured I had a couple days to work on my crafts!
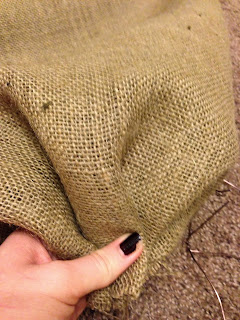
I went to Wal-Mart to buy some burlap. Our Wal-Mart is so small they do not have a fabric section so thankfully in the holiday section they had 6-yards of mesh burlap.
I couldn't find any type of circle thing that I could make the wreath on. In the clearance section I found some little bendable wire. I used that, and it seems to hold pretty well.
Let me show you guys what I did with the wire.
This is the wire I bought. Only $1.00! I bought two but I did not even use one.
I cut it into even pieces about 4 inches. You want to have enough room to put the burlap in-between it. So, if I make another one I will cut the pieces more like 5 inches long.
I made a big circle just eyeballing how big I wanted my wreath to be. Then I just twisted the ends together like you would twist a twisty tie on a bread loaf.
Put your pieces about 2 1/2 inches apart. I just put one of the pieces I cut on by twisting it around the metal on the circle. Make sure your piece of wire is sticking up to help you when you start putting your material on. Shown in the picture above.
This is the circle with all of the pieces on it. I put to many pieces on it for my circle. Once you get started you will see if you put to many or not enough based on how much fabric you want to put on your wreath. Since I had to many I just twisted the extra pieces off. My circle was actually a little bit to big also so I just cut a piece out of my circle and twisted the two ends together.
With your circle together with the pieces twisted on it you are now ready to add your burlap (or whatever material you would like, I have seen some super cute wreaths made from different types of meshes)
Bunch up your material and place it in-between the two ends of your metal piece. Then twist your piece of metal around the end of your material.
Then bunch up the next section of your fabric and put in in-between your metal piece and twist! And continue doing that process throughout your whole circle. Make sure you have a consistent amount of fabric each time you grab another section.
This is what mine looked like after I did a couple sections.
This picture is to show you how the twist kind of makes a big section between your two burlap sections. I did not really like that look, I wanted a more full look so I fluffed the burlap up and kind of fanned out the burlap so it covered the metal pieces and looked fuller.
This is what it looked like after I fluffed it up, I am very happy with how it turned out!
While I was in Wal-Mart I found this wood B in their craft section. B is for Brown (My last name) I wanted to personalize my wreath a little bit. I didn't like the wood look just because it was light wood and it obviously looks like a craft letter. So, I have this white paint from painting our new home. It is just a Latex Semi-gloss white paint.
I love all things white for decorating so I figured I couldn't go wrong with painting it white. I thought about doing it chevron with white and another color, but I couldn't think of a color that would look good in my living room so I just went with a classic white. I am glad I just did a classic white now because it fits perfects with my entry way decorations.
I love how it came together! To learn about the lamp in this picture you can read my blog post, Restoration Phase One.
I would love to see some wreaths that you have created! Show me on Instagram, Facebook, Pinterest, Twitter, and Bloglovin!


No comments:
Post a Comment